
Modern Fields lets you create your own blocks for the block editor without writing any JavaScript. You declare the block in the admin, attach a fields group to it, and render it with a PHP template in your theme. No React, no build step.
Custom blocks are only available in the pro version of Modern Fields.
A block takes three steps, and the block screen tracks them in a checklist: register the block, assign a fields group, create the theme template. A fourth step, optional, attaches a stylesheet and a script to the block.
This page builds a Testimonial block as an example, named acme/testimonial, with three fields: a quote, an author and a photo.
Step 1: Register the block
Go to Modern Fields > Blocks. This screen lists your custom blocks.
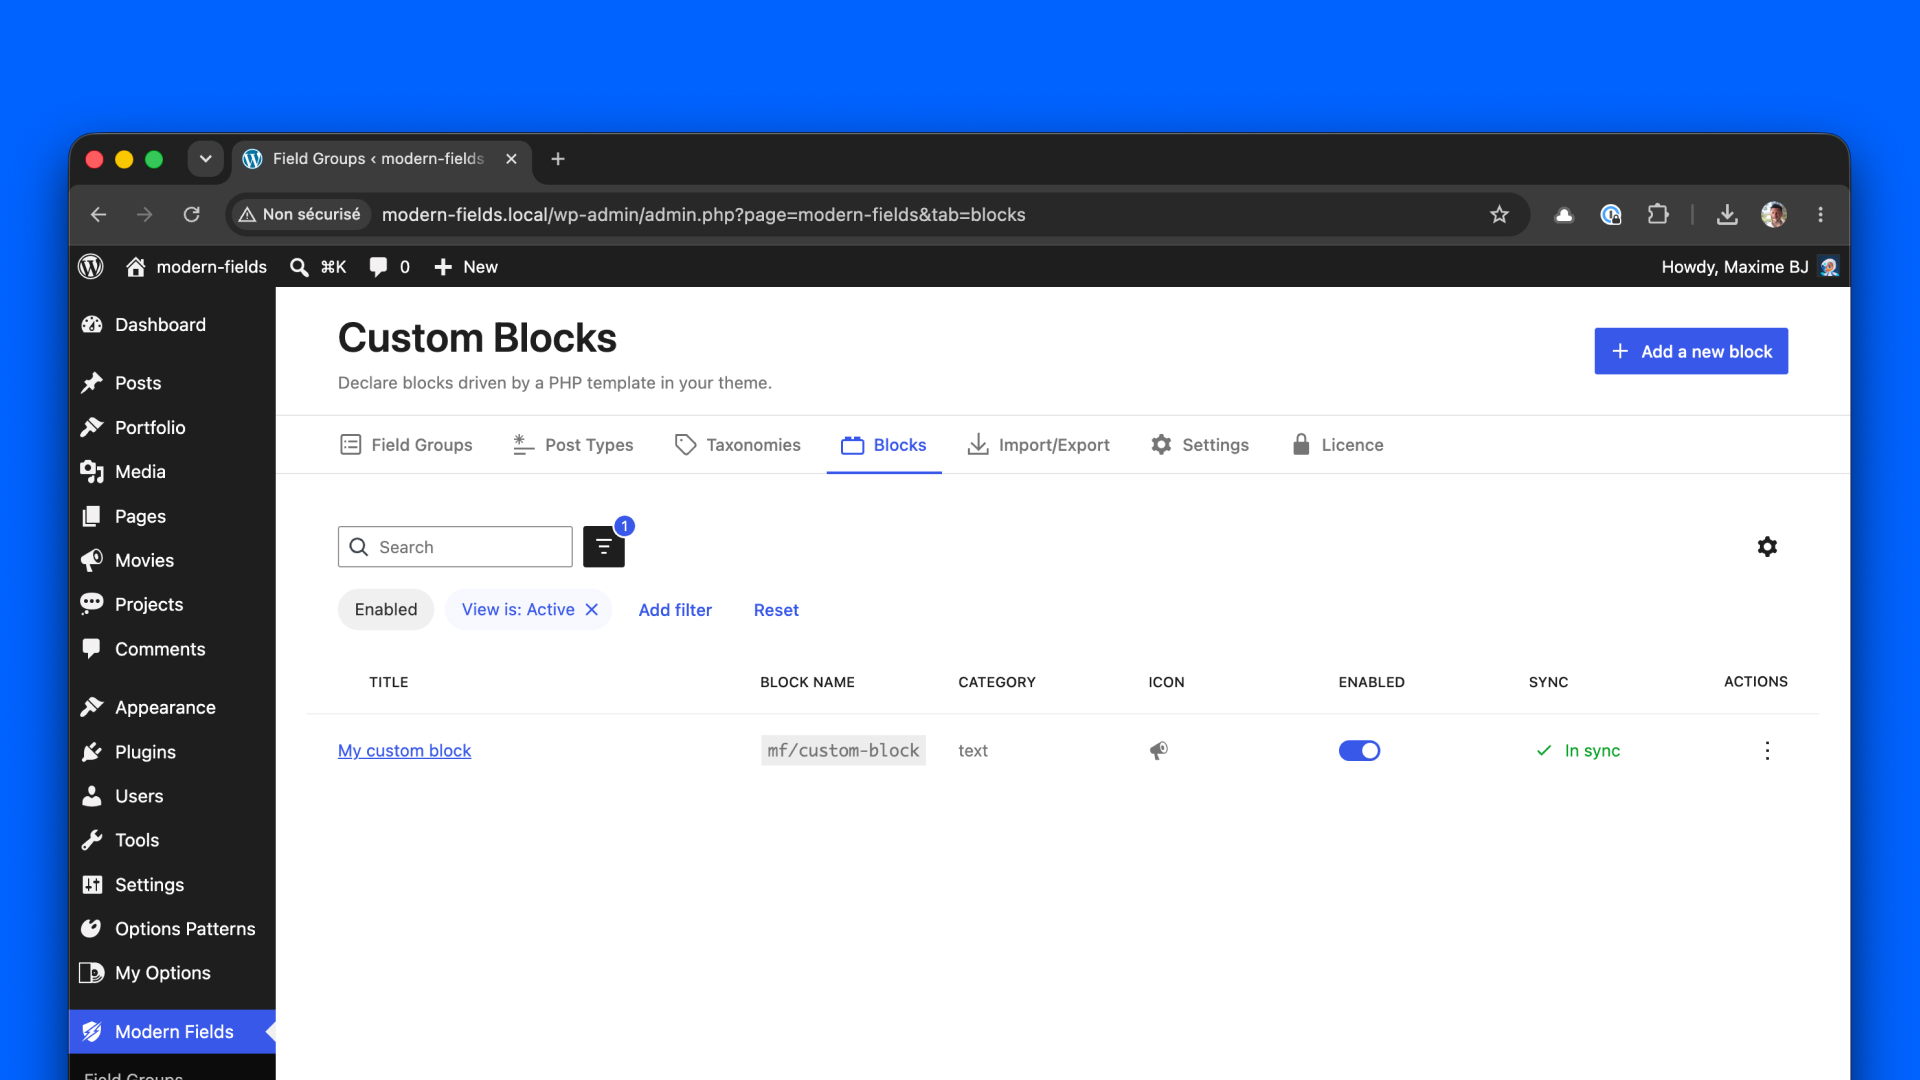
Click Add a new block. The form is split into sections, listed on the left, and the Checklist on the right shows what is left to do.
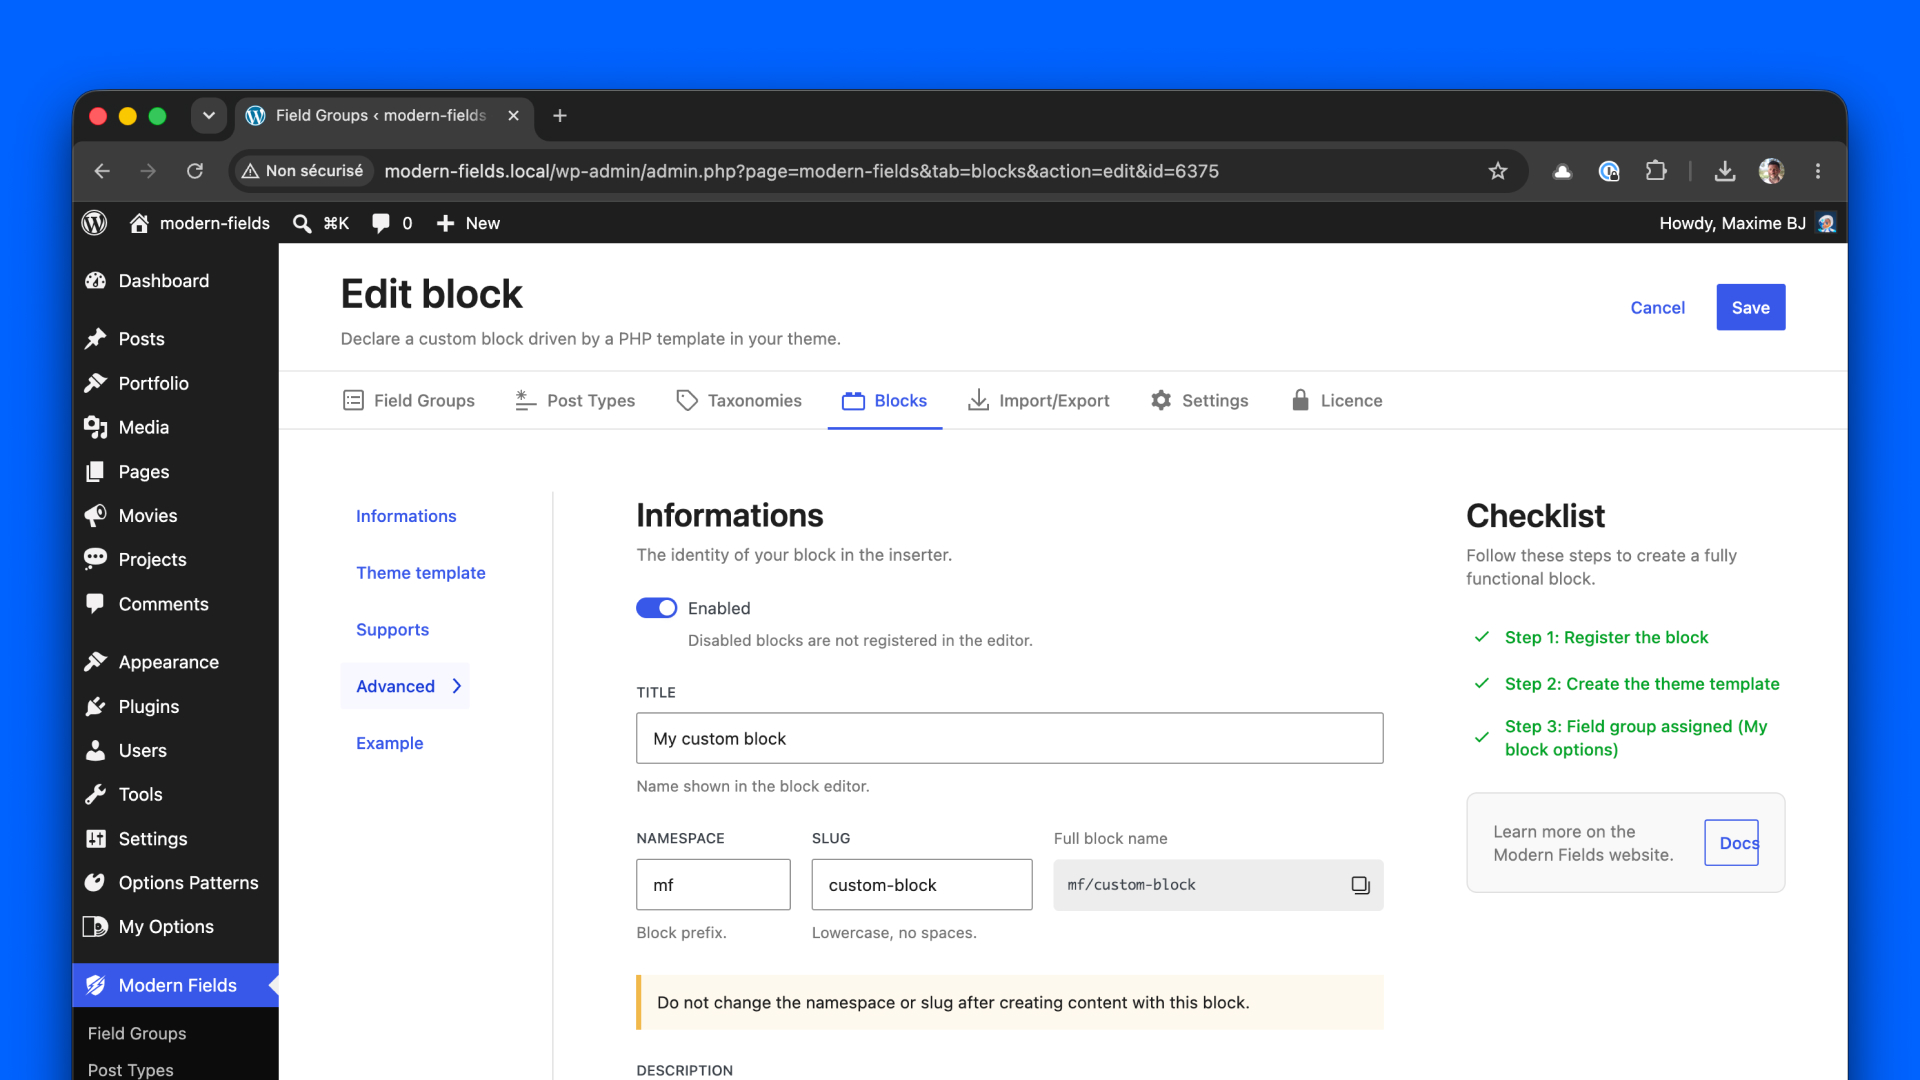
Informations
| Setting | Effect |
|---|---|
| Enabled | A disabled block is not registered: it leaves the inserter, and the blocks already in your content stop displaying. Use it to switch a block off without deleting it. |
| Title | The name of the block in the editor. While you type it, the slug is filled in for you. |
| Namespace | The prefix of the block name, mf by default. Use the same one for all your blocks, such as your theme or project name. |
| Slug | The unique identifier of the block: lowercase, no spaces. The namespace and the slug make the full block name, here acme/testimonial. |
| Description | Shown in the inserter preview and in the block inspector. |
| Category | The inserter category. Categories added with the block_categories_all filter are listed too. |
| Icon | The block icon in the inserter and the toolbar. |
| Keywords | Extra terms to find the block when searching the inserter. |
Warning: don’t change the namespace or the slug once the block is used in your content. The blocks already inserted keep the old name, and WordPress no longer recognizes them.
Supports
Supports are native WordPress controls you turn on in one click. WordPress adds the settings to the block inspector, saves them and generates the CSS. When a support covers your need, prefer it to a field.
| Support | Effect |
|---|---|
| Alignment | Wide and full width controls. |
| Anchor | Lets editors add an HTML anchor (id) to link to the block. |
| Custom class name | An additional CSS class field in the Advanced panel. Checked by default. |
| Edit as HTML | Allows editing the block markup directly. |
| Layout | Flow and flex layout controls. |
| Color | Text, Background, Gradients and Link colors. |
| Spacing | Margin, Padding and Block gap. |
| Typography | Font size and Line height. |
| Dimensions | Minimum height. |
Supports only apply if your template prints get_block_wrapper_attributes() (see step 3). More details in the WordPress documentation.
Advanced and Example
The Advanced section holds optional block metadata: Text domain to translate the block strings, Parent to only allow the block as a direct child of the listed blocks, and Ancestor to only allow it anywhere inside them. See the WordPress documentation.
The Example section sets the preview shown when hovering the block in the inserter: a JSON object of field values, keyed by field name.
Click Save: the block is registered, and you can already find it in the inserter.
Step 2: Create the fields group
Go to Modern Fields > Field groups and create a new group (see Creating your first fields group). Add the fields of your block.
Each field has a Name in its settings: it is the key you will use in the template. Choose explicit names, such as quote, author and photo.
In the location selector at the bottom of the screen, choose Block > My custom blocks, then select your block. A group can target several custom blocks.
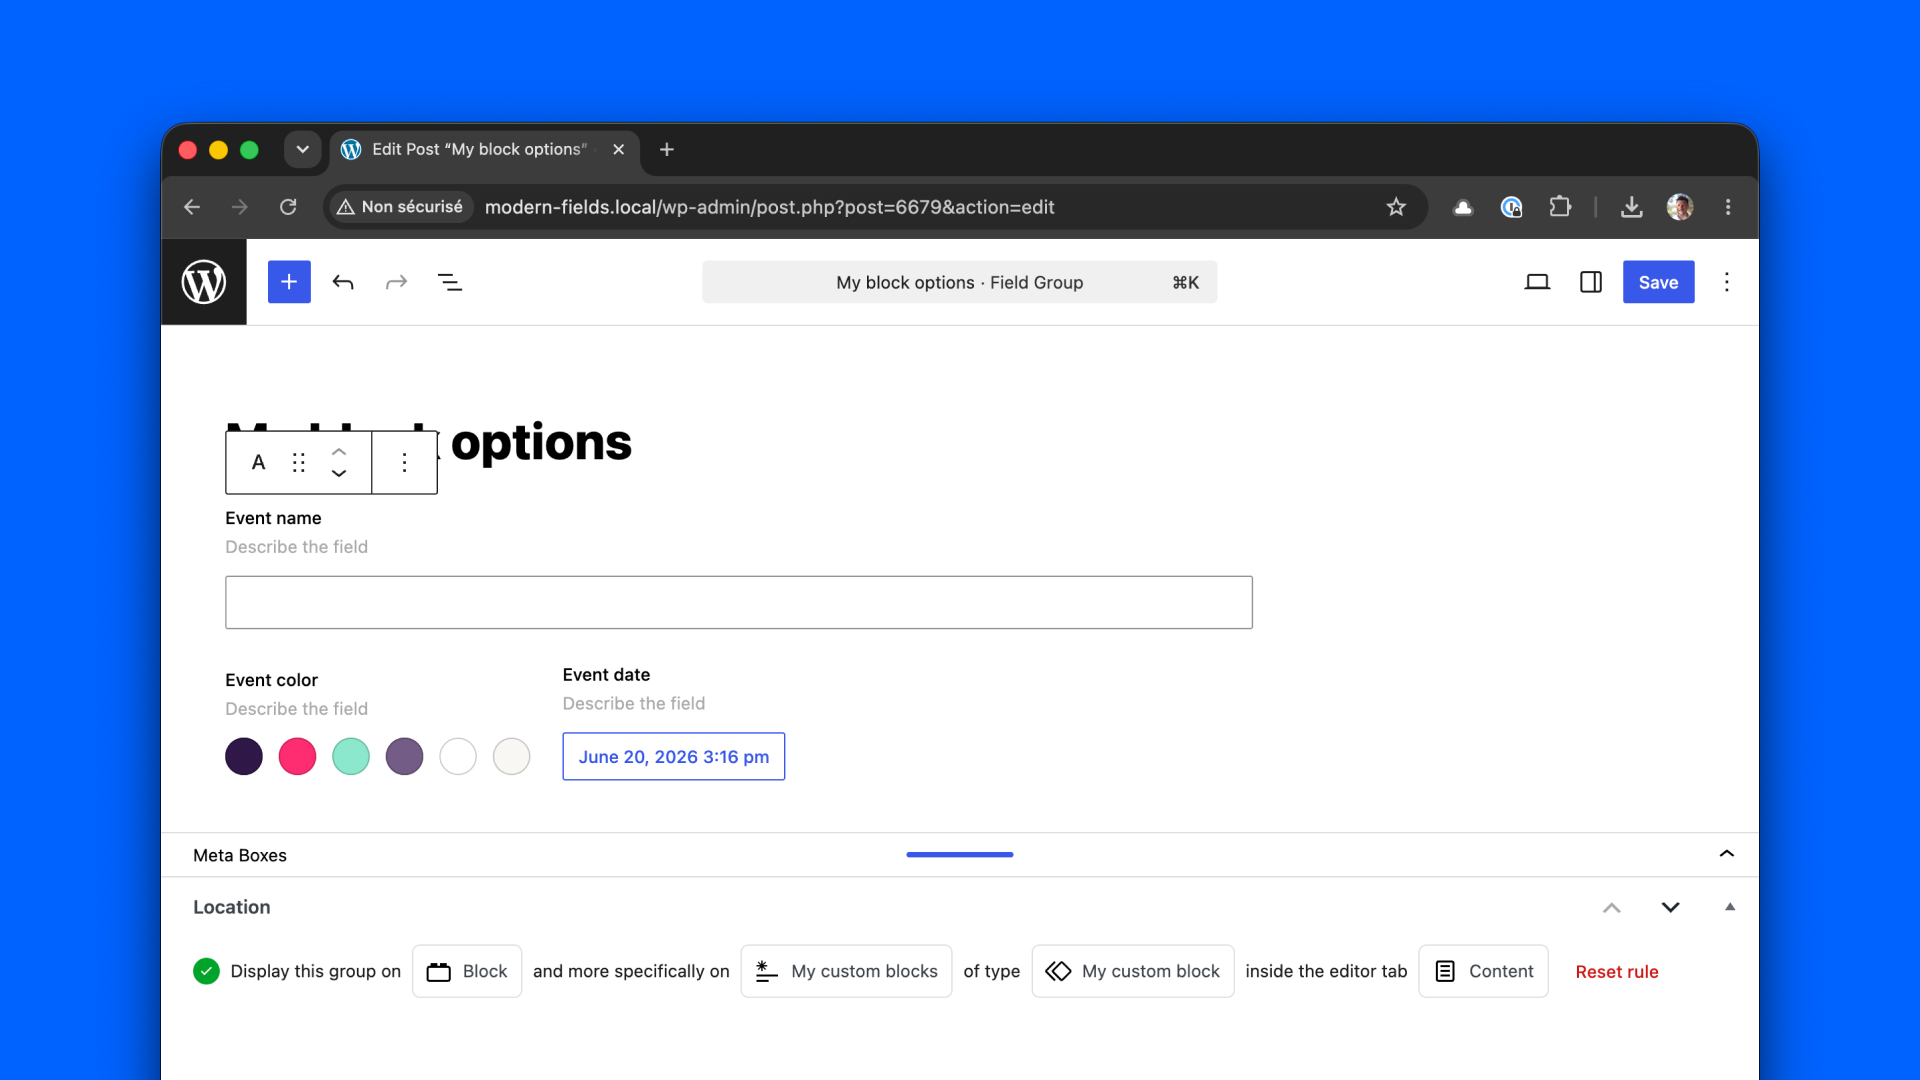
Then, choose the inspector tab where the fields show up:
- Content: for content fields, like text, textarea or rich text. The tab is added to the block if it doesn’t have one.
- Settings (default): for options, like select, multi-token or button group.
- Styles: for design fields, like color, spacing, range or border.
- Advanced: not a tab, but the Advanced panel, collapsed at the bottom of the inspector. For rarely used settings.
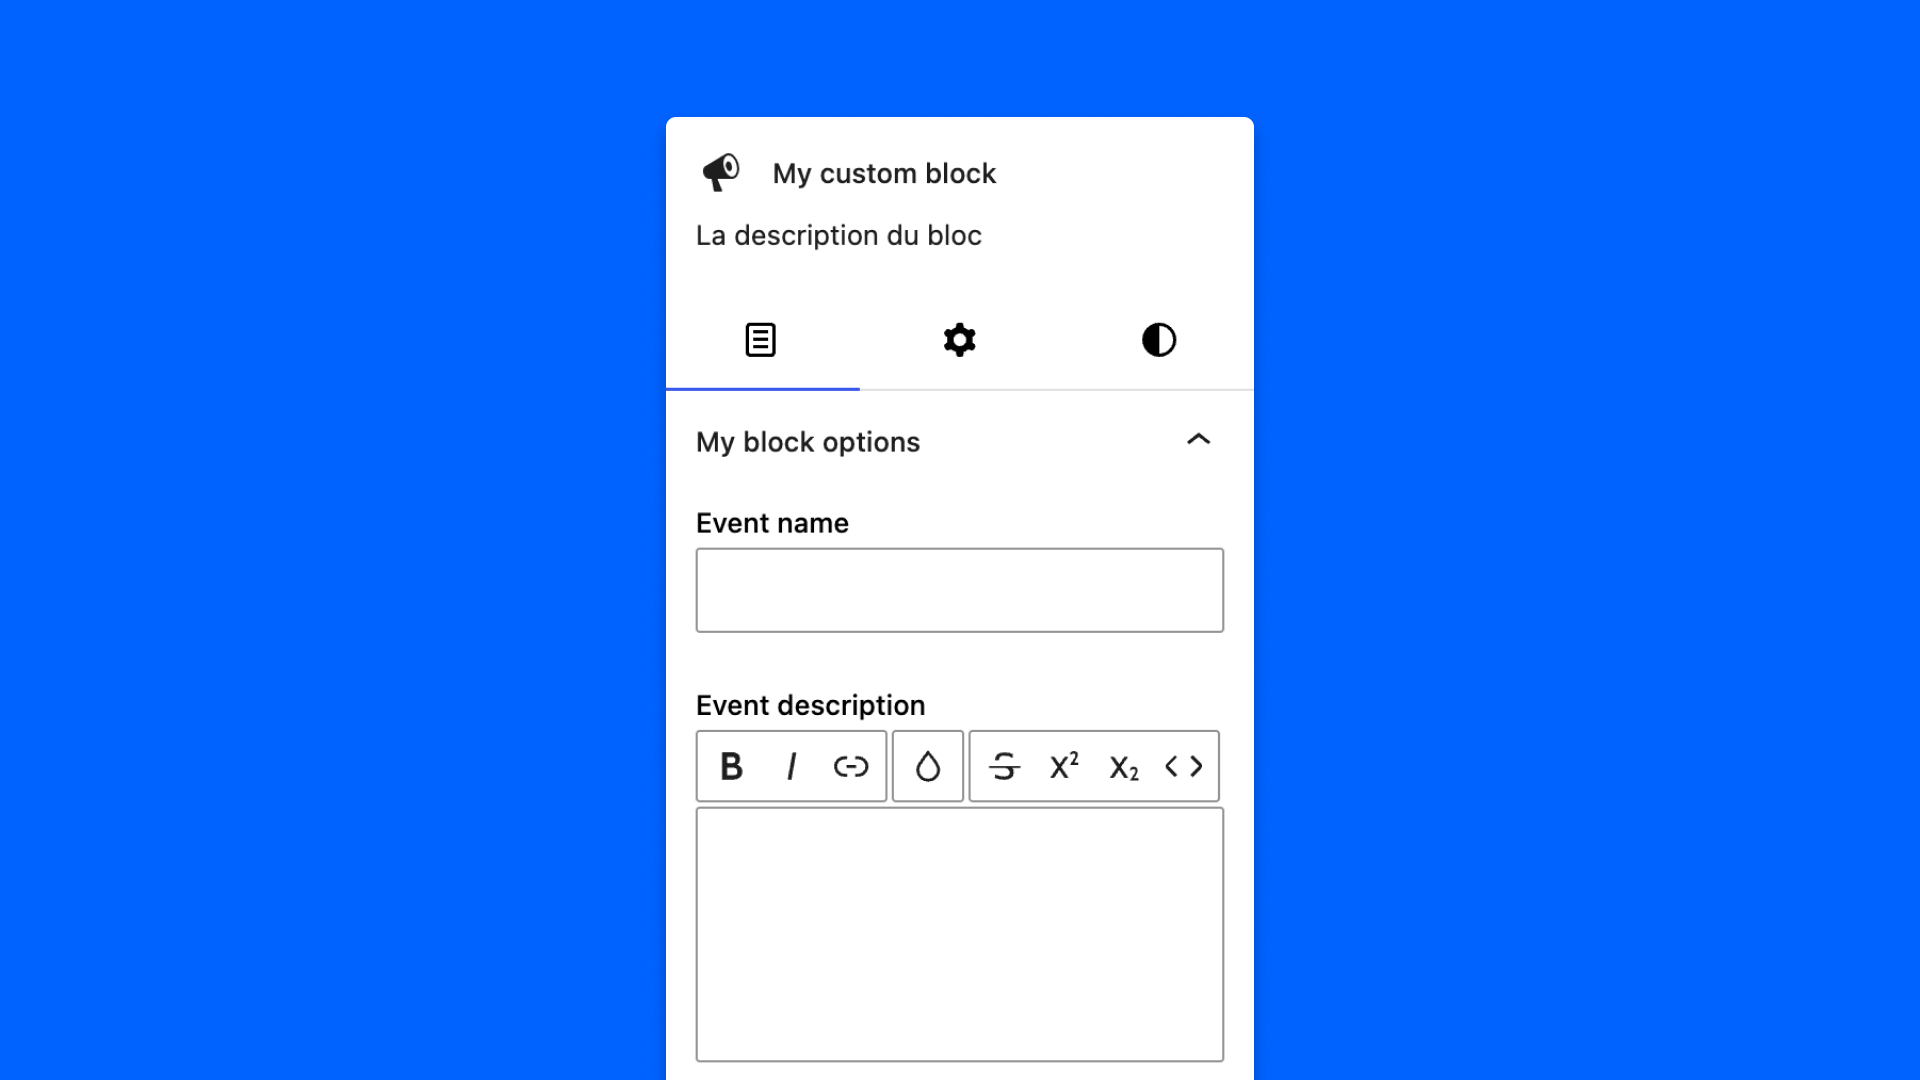
A group shows in a single tab. To spread your fields over several tabs, create one group per tab and assign them all to the same block.
Note: the values are saved in the block itself (in its attributes, inside the post content), not in the post meta table. Each block keeps its own values, and get_field() can’t read them: use $fields in the template.
Step 3: Create the template
The block is rendered in PHP by a template in your theme. The file goes in the blocks/ folder of your theme and is named after the block: {namespace}-{slug}.php. For acme/testimonial, create blocks/acme-testimonial.php.
The Theme template section of the block screen shows the exact path to create, and turns green once the file is found. Modern Fields looks in the child theme first, then in the parent theme.
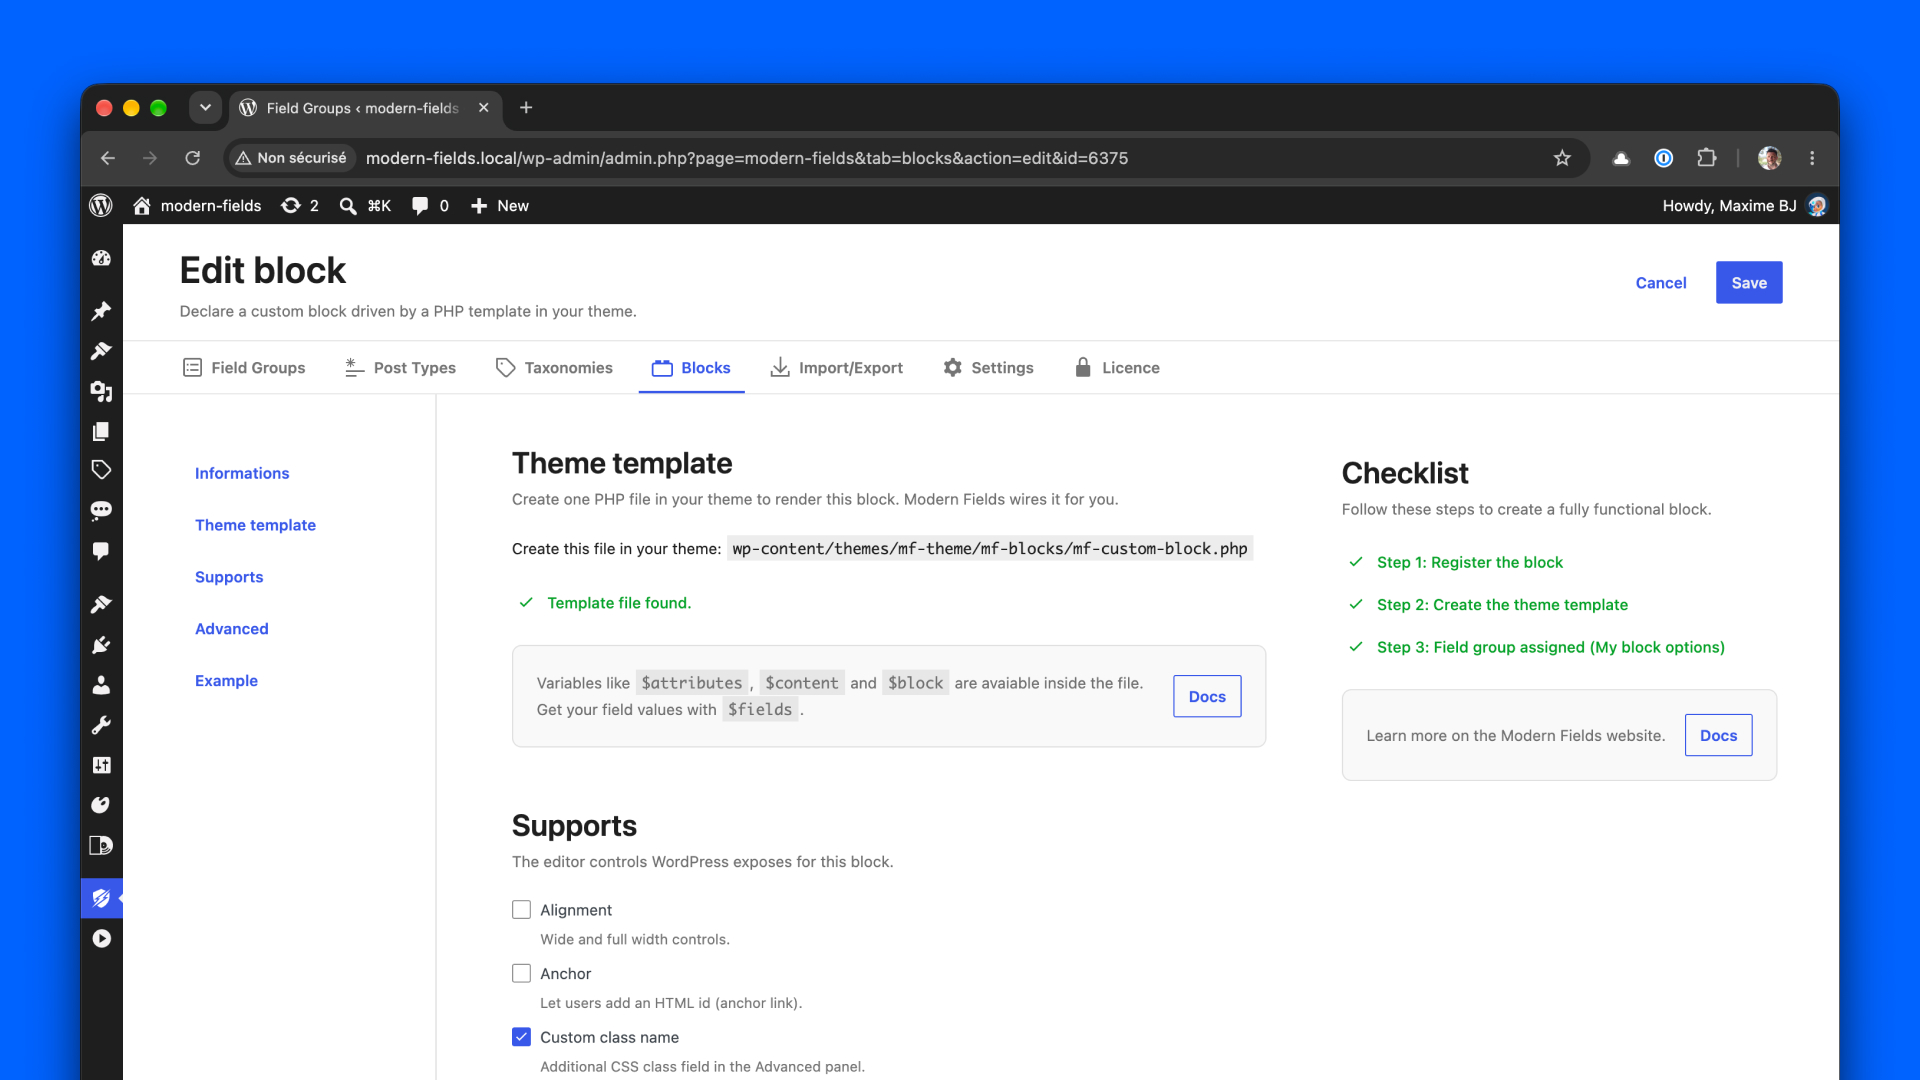
These variables are available in the template:
| Variable | Content |
|---|---|
$fields | The field values, keyed by field name. |
$attributes | All the block attributes. The field values are also in $attributes['modernFields']. |
$block | The WP_Block instance being rendered. |
$content | The inner content of the block. Custom blocks have no inner blocks, so it is empty. |
A few rules to follow:
- Print
get_block_wrapper_attributes()on the root element. It outputs the classes and styles of the supports (colors, spacing, alignment…) and the default class of the block,wp-block-acme-testimonial. - A field never edited in the block is missing from
$fields, even if it has a default value. Always set a fallback with??. - Values are raw: an Image field returns an attachment ID, not a URL. The Fields handbook details the value of each field type, and the helper functions turn some of them into ready-to-print data.
- Escape every value you print:
esc_html(),esc_url(),esc_attr().
The same template renders the block on the front-end and its preview in the editor. Until the file exists, the editor shows a placeholder with the expected path, and nothing displays on the front-end.
When the three steps of the checklist are green, your block is ready.
Change the templates folder
To store the templates in another folder of your theme, use the modern-fields/blocks/template_directory filter in your functions.php file:
Create the folder in your theme: the path shown in the block screen follows the new name.
Step 4: Add styles and scripts
A custom block is a regular WordPress block. Attach its stylesheet and script to the block itself, the native way, rather than loading them on every page.
Attach a stylesheet
Use the native wp_enqueue_block_style() function in your functions.php file. Its first argument is the full block name.
In this example, the CSS file is assets/css/testimonial.css in your theme. Target the block with its default class, .wp-block-acme-testimonial.
WordPress also loads the stylesheet in the editor, so the preview matches the front-end. With a block theme, the front-end only loads it on the pages that display the block. The path key lets WordPress print a small stylesheet inline rather than as a separate file.
Attach a script
WordPress has no wp_enqueue_block_script(). A script is attached to a block through its view_script_handles property, the PHP equivalent of viewScript in a block.json file. Modern Fields registers your blocks with register_block_type(), so you can add your script with the native register_block_type_args filter:
WordPress then enqueues the script only on the pages where the block is rendered. A view script only runs on the front-end, not in the editor preview.
The filter has to be added before Modern Fields registers the blocks, on init: adding it directly in functions.php, as above, is early enough.
For a script module, for instance with the Interactivity API, register it with wp_register_script_module() and add its ID to view_script_module_ids in the same filter.